supabase私有化部署
January 3, 2025
Supabase 私有化部署官方文档中存在一些小的问题,包括:
- 一些细节的说明。比如如何增加Provider等,需要了解 supabase/auth 项目的细节才能知道如何去修改配置。
- Supbase 模块太多,一些不太常用的模块都集成在了 docker-compose.yml 中。
之前在项目中有使用官方提供的supbase托管,但是外网等原因使用起来不太方便,于是决定自己部署。自部署的版本在多租户、容灾能力上等与官方版本有所差异,但是Auth、Rest等基础能力基本上并没有差异,对于小型项目来说足够使用了。
整体部署流程大致如下:
- 编辑 docker-compose.yml ,去掉部分不需要的模块。
- 配置 env file:
- Auth:根据项目需要,配置基础地址、callback地址以及Provider等。
- Email:邮件服务相关配置,用于邮箱认证等。
- 运行docker: docker compose up -d ,本地测试管理台、DB、API可用性。
- Release环境部署。包括域名、证书、服务器等。
项目代码已经存放在此:
模块选择
Supabase当前官方docker file中包括以下模块:
| Module | Port | Container | Image | 简介 | Routes |
|---|---|---|---|---|---|
| studio | 3000 | supabase-studio | supabase/studio | 管理台 | /* -> http://studio:3000/* |
| kong | - ${KONG_HTTP_PORT}:8000/tcp - ${KONG_HTTPS_PORT}:8443/tcp | supabase-kong | kong:2.8.1 | 反向代理 | |
| auth | GOTRUE_API_PORT: 9999 | supabase-auth | supabase/gotrue | 认证及用户管理 | http://auth:9999/verify http://auth:9999/callback http://auth:9999/authorize /auth/v1/* -> http://auth:9999/* |
| rest | PostREST默认监听端口为3000 | supabase-rest | postgrest/postgrest | rest/graphQL API | /rest/v1/* -> http://rest:3000/* /graphql/v1/* -> http://rest:3000/rpc/graphql |
| realtime | PORT: 4000 | supabase/realtime | RealTime服务 | /realtime/v1/* -> ws://realtime:4000/socket/* /realtime/v1/* -> ws://realtime:4000/socket/ | |
| storage | 5000? | supabase/storage-api | Storage服务,可用minio代替 | /storage/v1/* -> http://storage:5000/* | |
| imgproxy | 5001 | darthsim/imgproxy | 图片处理 | ||
| meta | 8080 | supabase-meta | supabase/postgres-meta | pg的meta服务,管理台使用 | /pg/* -> http://pg-meta:8080/* |
| functions | 9000 | supabase/edge-runtime | Function服务 | /functions/v1/* -> http://functions:9000/ | |
| analytics | 4000 | PG | /analytics/v1/* -> http://logflare:4000/* | ||
| db | 5432 | supabase/postgres | DB | ||
| vector | ? | timberio/vector | 向量服务,同时也用于日志处理 | ||
| supavisor | supabase/supavisor | PG的连接池 |
个人在项目中去掉了以下几个模块:
- Realtime:websocket服务,暂时没有需要。而且ws对端口的资源消耗比较大,在大业务场景应该和API隔离。
- Storage:更加倾向于使用外部CDN。包括imageProxy应该使用专用的图片处理服务。
- Functions:函数服务。暂无使用场景。
保留的模块:
- kong:反向代理,必须。
- studio:管理台,用于管理各模块,包括DB interface、日志等。
- auth:Supabase的用于认证模块
- db:postgres,必须。
- meta:为管理台提供db的meta信息。
- log(analyze):日志服务,用于定位服务、接口访问异常。
- vector:向量服务,同时也服务supabase各模块的日志处理。如果无日志要求可以去掉。
- supavisor:Supabase提供的pg向量池服务。是否可以去掉待确定。
Auth
URL Configuration
对应supabase官网项目中的URL配置:
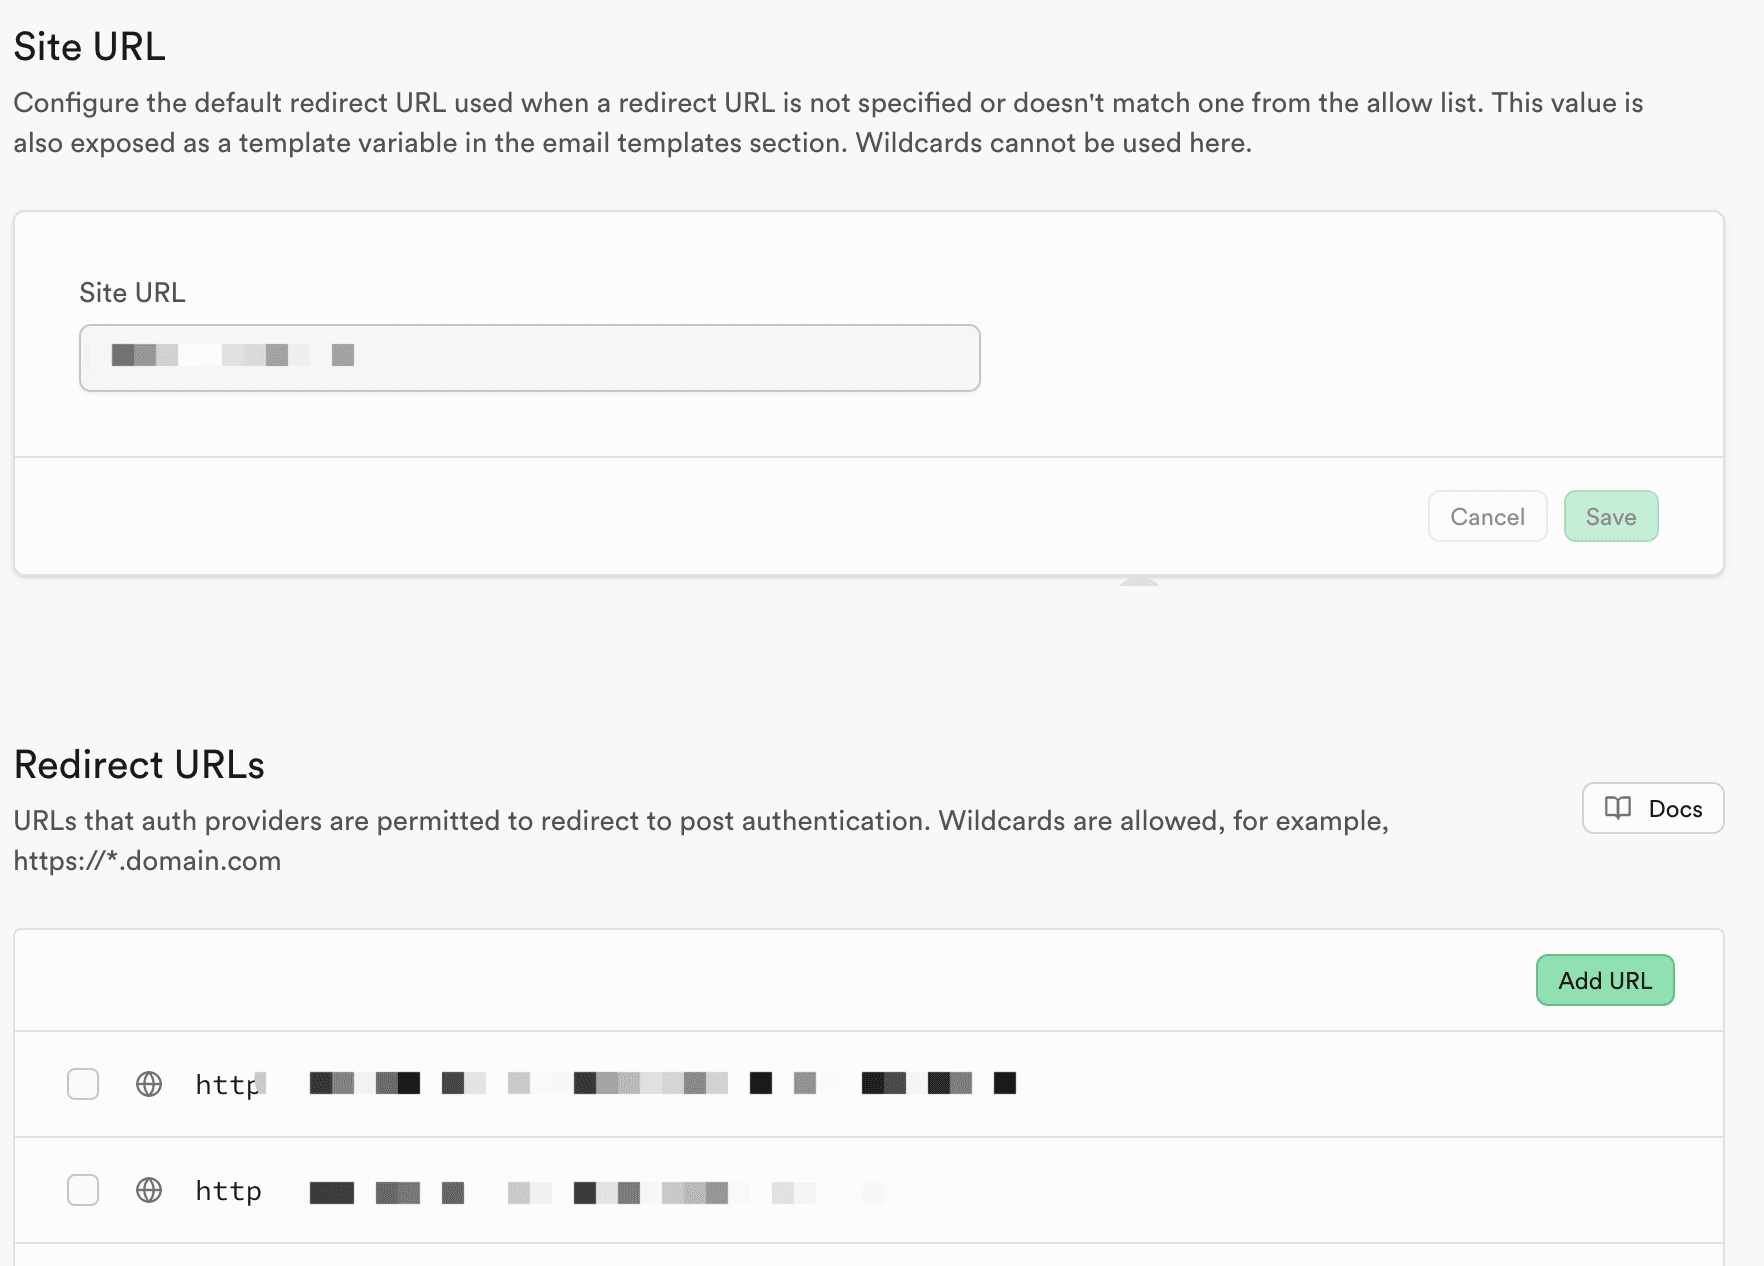
SiteURL
使用supabase认证的应用地址,具有唯一性。配置方式:
#GOTRUE_SITE_URL: ${SITE_URL}
SITE_URL=http://localhost:3000
可见supabase/auth更推荐的方式是作为公共服务,而非为单个应用部署。此配置有两个作用:
- 认证邮件拼接:supabase/auth signup、invite等邮件模板中有使用siteurl作为变量,引导用户点击确认。
const defaultInviteMail = `<h2>You have been invited</h2>

<p>You have been invited to create a user on {{ .SiteURL }}. Follow this link to accept the invite:</p>
<p><a href="{{ .ConfirmationURL }}">Accept the invite</a></p>
<p>Alternatively, enter the code: {{ .Token }}</p>`
- authorize后的默认callback地址:可以被callback参数覆盖。
func (a *API) getExternalRedirectURL(r *http.Request) string {
	ctx := r.Context()
	config := a.config
	if config.External.RedirectURL != "" {
		return config.External.RedirectURL
	}
	if er := getExternalReferrer(ctx); er != "" {
		return er
	}
	return config.SiteURL
}
Redirect URLs
URI为supabase/auth服务端的地址白名单,支持多个白名单地址,格式为 https://foo.example.com,https://*.foo.example.com,https://bar.example.com 。
此地址的目的与OAuth流程中的auth.callback参数类似,具体原理参考我之前的文章。
配置格式:
#GOTRUE_URI_ALLOW_LIST: ${ADDITIONAL_REDIRECT_URLS}
ADDITIONAL_REDIRECT_URLS=“http://localhost:3000/auth/*”
Provider
self-hosting时,studio上没有放开provider的配置入口,只能通过后台配置。在 docker-compose.yml 的auth服务中增加对应的provider配置:
# Whether this external provider is enabled or not
EXTERNAL_X_ENABLED = true

#The OAuth2 Client ID registered with the external provider.
EXTERNAL_X_CLIENT_ID = <your-client-ID>

# The OAuth2 Client Secret provided by the external provider when you registered.
EXTERNAL_X_SECRET = <your-secret>

# The URI a OAuth2 provider will redirect to with the code and state values.
# The redirect url is usually https://<domain pointing to port 8000>.com/auth/v1/callback
EXTERNAL_X_REDIRECT_URI = <your-redirect-url>
Github
以github为例,增加github对应的provider:
# Github OAuth config in auth.enviroment
GOTRUE_EXTERNAL_GITHUB_ENABLED: true
GOTRUE_EXTERNAL_GITHUB_CLIENT_ID: ${GITHUB_CLIENT_ID}
GOTRUE_EXTERNAL_GITHUB_SECRET: ${GITHUB_CLIENT_SECRET}
GOTRUE_EXTERNAL_GITHUB_REDIRECT_URI: ${AUTH_REDIRECT_URL}


# env
## Providers github, applying method can be found in official documentation
GITHUB_CLIENT_ID="xxx"
GITHUB_CLIENT_SECRET="xxx"
# callback address during oauth authorization callback.
AUTH_REDIRECT_URL="http://localhost:8000/auth/v1/callback"
配置完毕后可以通过API进行验证对应的配置是否准确。
curl 'https://<PROJECT_REF>.supabase.co/auth/v1/settings' \
-H "apikey: <ANON_KEY>" \
-H "Authorization: Bearer <ANON_KEY>"
Email Settings
Recovery Temlate
supabase/auth 默认的邮件模板不论是功能还是样式上都不太满足需求,所以此处修改对应的邮件模板。此功能与官网上的Email Template配置相同。

以 reset password 场景为例,介绍如何修改默认邮件模板。
默认模板:
const defaultRecoveryMail = `<h2>Reset password</h2>

<p>Follow this link to reset the password for your user:</p>
<p><a href="{{ .ConfirmationURL }}">Reset password</a></p>
<p>Alternatively, enter the code: {{ .Token }}</p>`
修改方法:将模板内容放到外部链接,并修改auth对应的环境变量指向外部链接即可。
#URL path to an email template to use when resetting a password. (e.g. `https://www.example.com/path-to-email-template.html`).`SiteURL`, `Email`, and `ConfirmationURL` variables are available.
GOTRUE_MAILER_TEMPLATES_RECOVERY="https://www.example.com/path-to-email-template.html"
模板内容参考:
<h2>Reset My Password</h2>

<p>Follow this link to reset the password bro:</p>
<p><a href="{{ .SiteURL }}/auth/confirm?token_hash={{ .TokenHash }}&type=recovery&next={{ .RedirectTo }}">Reset Password</a></p>
注意:与官方模板不同的是跳转地址的配置,业务关系使用了个人nextjs项目的一个通用callback action来实现code to session的转换及cookie的下发。具体代码可以参考这里。
SMTP Setting
配置邮件服务器信息,主要用于邮件相关的认证,包括邮箱注册、密码找回登。
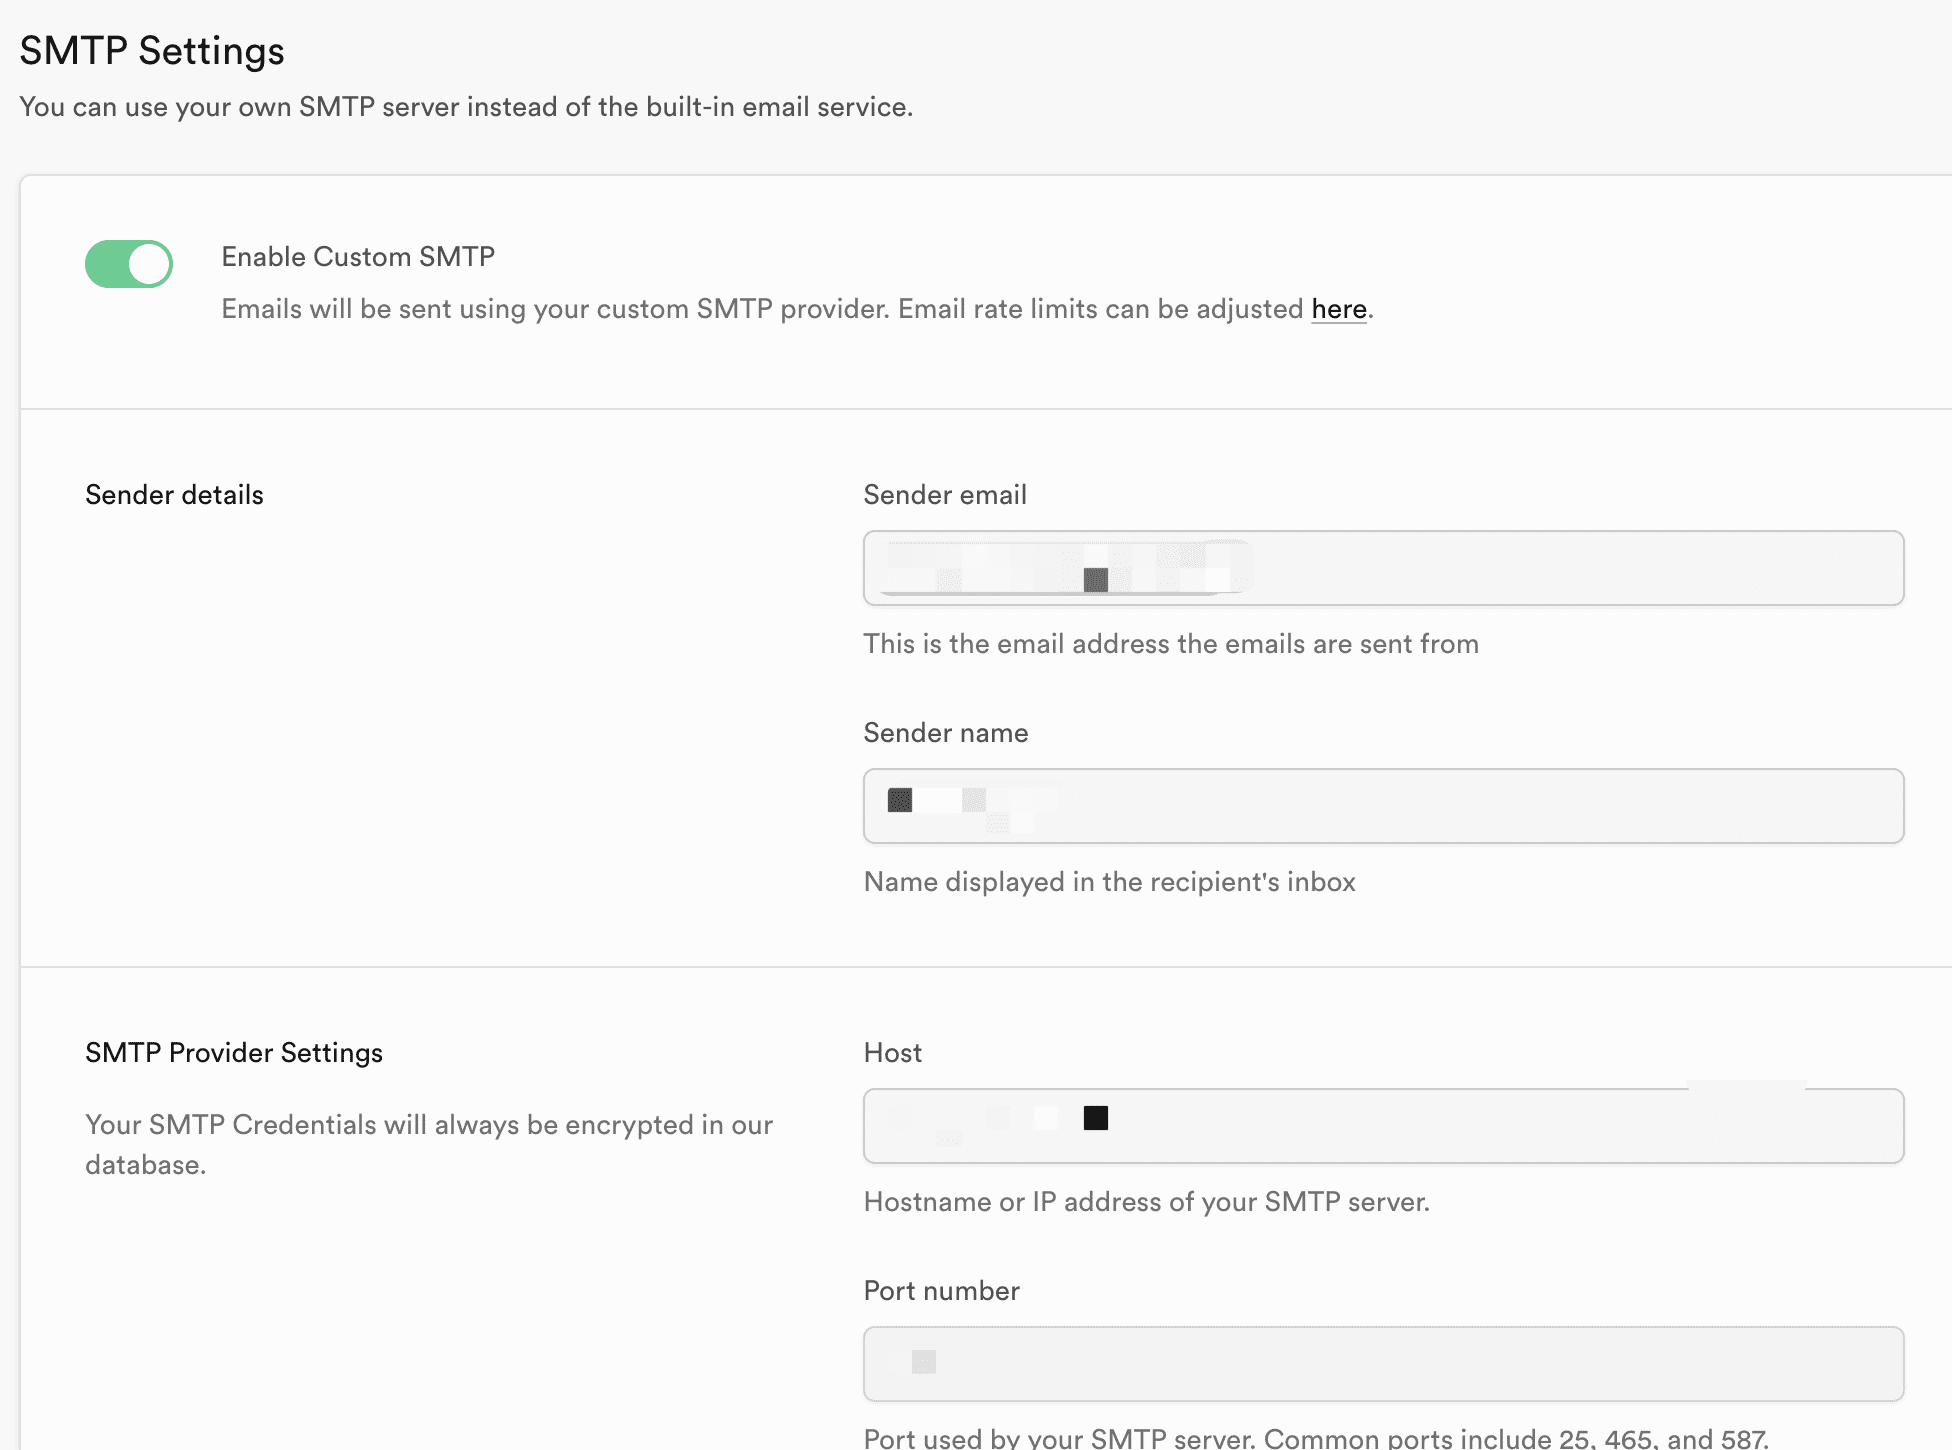
主要参数包括:
SMTP_ADMIN_EMAIL=
SMTP_HOST=
SMTP_PORT=
SMTP_USER=
SMTP_PASS=
SMTP_SENDER_NAME=
个人使用的腾讯云的邮件推送服务。有一定的免费额度。
其他
SSL
参考项目中的配置。推荐使用 acme.sh 生成免费证书,并自动续期。生成及自动续期大致代码如下:
# pre-require: 配置acme环境

# 腾讯云的生成方式
acme.sh --issue --dns dns_tencent -d example.com

# install
acme.sh --install-cert -d auth.goroutine.cn \
 --key-file       /xxx/supabase-docker/volumes/ssl/example.key.pem  \
 --fullchain-file /xxx/supabase-docker/volumes/ssl/example.cert.pem


# make readable
chmod a+x /xxx/supabase-docker/volumes/ssl/example.*

# reload
sudo docker restart supabase-kong
总结
个人在腾讯云的一台轻量服务器上部署了一次,整体流程还是比较简单的。建议服务器选择海外机房,因为docker国内镜像下载太麻烦了。